Sunday, March 30, 2014

Essential Oils 101: For the True Beginner {Part Two}

Welcome Back to Part Two of How to Use Essential Oils! 


IMG_1338


Hopefully, after reading Part One, you:

- learned some key words to look for when purchasing your oils
- decided where to purchase your oils {direct sales, health food stores, or online like I do}
- decided what medical issues you’d like to tackle with them 

Now it’s time for {what I think is} the real nitty-gritty: HOW TO USE THEM.  Because if any of you are like me, this is the “scariest” part, right?!   It feels so daunting initially, but it’s really not complicated at all – promise. :)

It was, however, a little tricky to type out for you guys in a way that would make sense…so I decided to bite the bullet and make a movie of how to use them!  YOU GUYS.  As I mention in the short video, I DO NOT like seeing myself filmed! This is TRUE LOVE for you as my blog readers that I would take a video of myself, okay?!  Haha! I really encourage you to watch the quick 5-minute video below before you keep reading – because it will really help everything else make a whole lot more sense! :)


{Oh and don’t even get me started on the thumbnail of my face.  Worst thumbnail ever but it wouldn’t let me change it! Haha! Humbling for sure!!}


Points discussed in the video:

- When using your EOs topically, you can either use them neat {undiluted} or diluted {with some kind of carrier oil}. 

- My favorite carrier oil, as I mentioned in the video, is Nature’s Way Coconut Oil.  They have several different sizes you can order, and the largest one is available for subscribe and save {Amazon ships you the oil on a regular schedule for a discounted fee – you can also get a smaller size Nature's Way Coconut Oil, 16 Ounce">Nature's Way Coconut Oil, 16 Ounce">Nature's Way Coconut Oil, 16 Ounce">Nature's Way Coconut Oil, 16 Ounce">here.}  It has 609 5-star reviews! It’s a really great product.  :) {These are my Amazon Affiliate links but you can rest assured I really do love and use this coconut oil!}


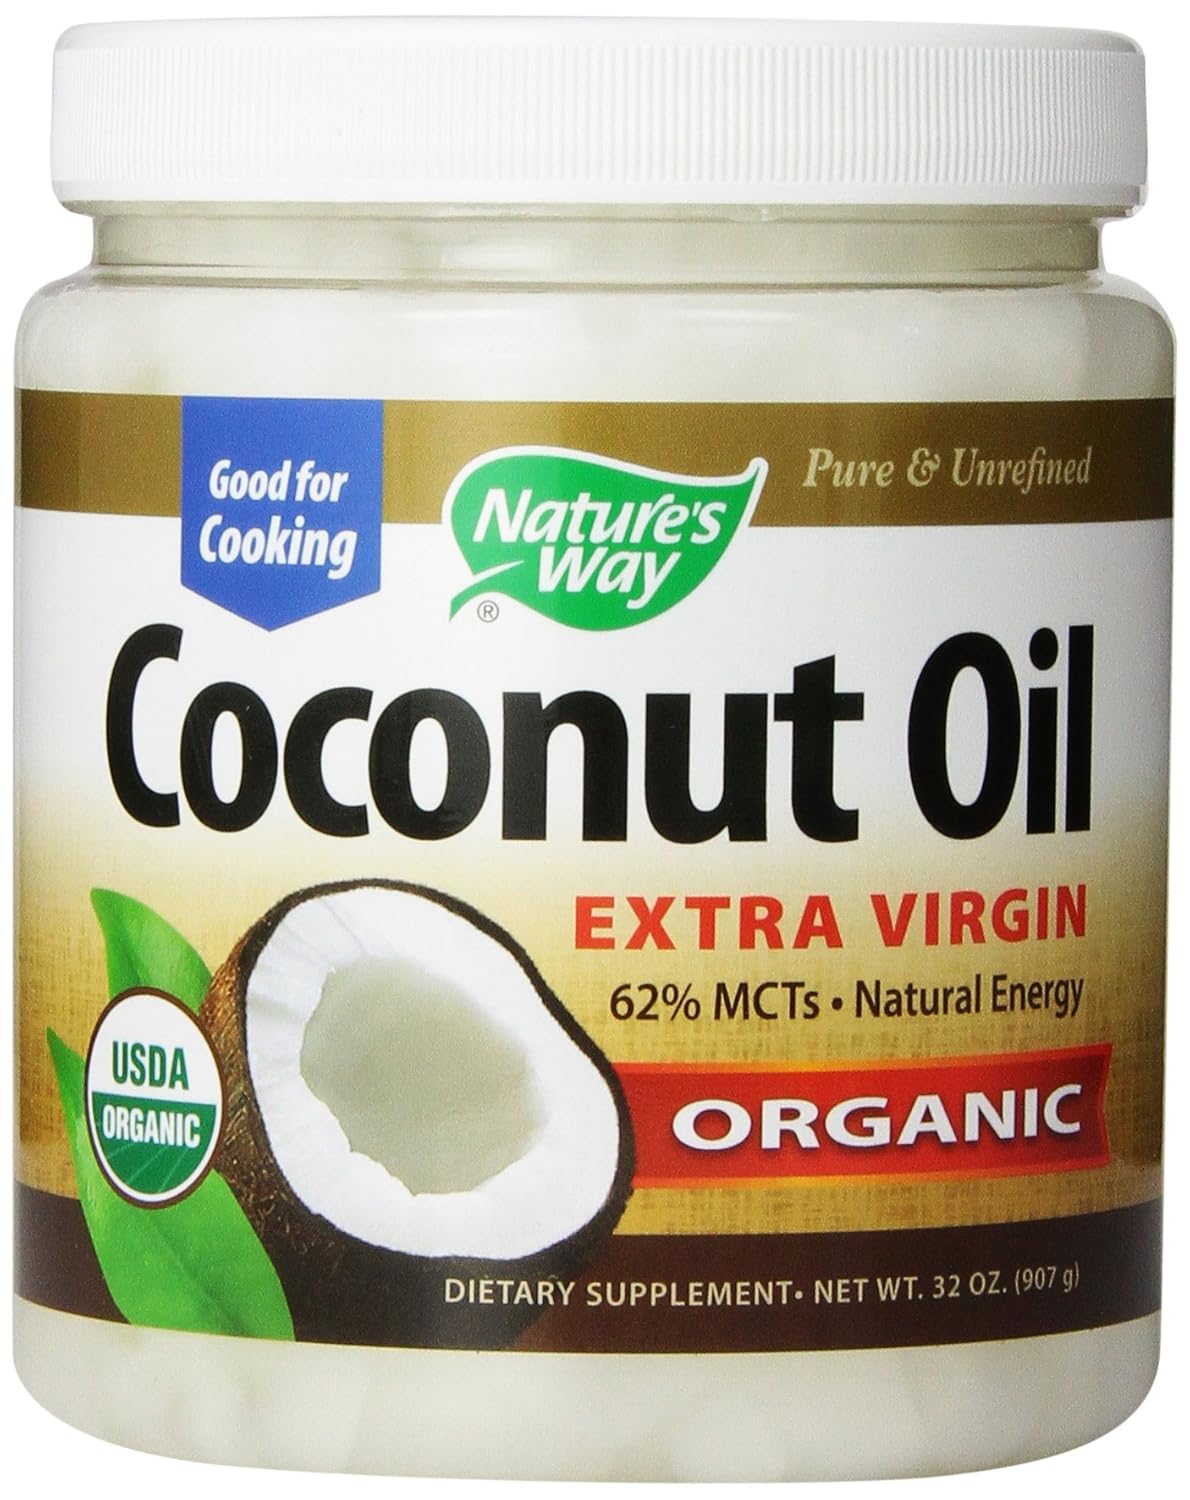
- Coconut oil is a solid at room temperature, but it has a SUPER low melting point, which means that basically by rubbing it between your fingers you’ll be able to get it to spread.  Some people prefer jojoba oil {and I’ve even used canola oil in a pinch!  haha!} but coconut oil is the preference for most oil users.  Look for organic, unrefined, highest-quality coconut oil

- As a rule of thumb, always dilute oils with children – and especially if an oil is considered “hot.”  {Oils with cinnamon in them, for instance, can irritate those with sensitive skin and should always be diluted – and some would say that hot oils should never be used on young children at all.}   It’s a smart idea to dilute an oil, even as an adult and even if it’s a mild oil, the first time you use it, just to make sure you don’t have a reaction to it. 

- Pretty much any area of the body is okay for using oils topically – but oils should NEVER BE USED IN THE EYES OR EARS. 

- When I want to use my oils, I’ll just get a drop or two of oil out of my bottle, and combine it together in my hand with a dab of coconut oil.  Then I apply it where I need to.  This is because, as I mentioned in the video, I know my skin is not sensitive to them.  Start with a large amount of carrier oil when you are first starting out!

The most popular/common place to put oils are on the bottoms of the feet.  The feet, surprisingly enough, are a great place to put oils because there are a crazy number of pores that will help the oil absorb pretty rapidly into the body. 

{I found this picture via a group I’m in on Facebook.  I am still learning about “vita flex” points – but basically they are points on the feet that correlate to other parts of the body and you can use them to help heal and assist other bodily ailments.  Right now I just rub oils on the bottom of my feet without paying attention to the specific vita flex points. I do this with oils that work preventatively to prevent colds and sickness, and oils that help reduce fevers and fight infections if we do get sick.}


IMG_1324


Besides topically, you can also use oils orally, diffused {inhaled} or even rectally for certain issues {using a capsule}.  Topical use is the most common use, which is why I dedicated this entire blog post to it.  I may have to expand this series to a Part 4 to cover the extra uses! :)

I highly recommend reading this information about essential oils on the Heritage Essential Oils page {the company I use}.  Lots of great additional information to be found there, including a helpful chart that breaks down dilution levels for children!

My goal is for you to feel empowered and educated…so if after reading this post you feel lost and confused {lol!!} PLEASE feel free to ask me a question in the comments! Okay? :)


Disclaimer:
*These statements have not been evaluated by the FDA. These products are not intended to diagnose, treat, cure, or prevent any disease.*

Monday, March 17, 2014

Essential Oils 101: For the True Beginner {Part One}

If you’re like me, you’ve likely heard about essential oils once or twice or a million times thanks to Pinterest and some of your favorite blogs.  Maybe your curiosity has been piqued…maybe you’ve pinned a couple posts about it…maybe you’ve read some pretty convincing stories of how they can heal…but you literally have no clue where to start with it all.  You have the desire to begin, but no idea how to take that first step.  That was me last Spring…a total believer but still not a drop of essential oils to be found in my house, because I was way too overwhelmed and confused about where to start. Then one day last May, I got a cold during Livi’s post-surgery recovery period and was terrified I’d get her sick and send her back to the hospital.  My friend Tami showed up at my doorstep with a bunch of different oils one day.  I took notes, started using them, got better, Livi never got sick….and the rest is history. ;) 


IMG_1338


If you’re feeling right now like I did last Spring, this is your lucky day…because I’m writing the post I wish *I* had been able to find a year ago!  :) In the last ten months, since I’ve been using essential oils on a consistent basis, I’ve had lots of friends ask me how I got started and to teach them what I know…so I decided to type it all out here to hopefully help some of you as well! 

I’m going to do a small mini-series about how to start using these miraculous oils.  My goal is that you will leave these posts feeling empowered and confident that YOU can start using essential oils, too. 

Preface: In a {HUGE} nutshell, everyone’s body gives off electrical charges.  When you are sick, the “power” of your body’s electricity decreases.  Essential oils work by “righting” your body’s natural electrical state and by bringing it back to normal, healthy levels. Crazy, but true!

Okay, so, let’s get started! 

---------------------------------------------

Step One: Know what descriptive words and qualities to look for, so you can feel empowered to make the right choices and get your money’s worth!

All oils are most definitely NOT created equal!  When looking for oils to use for medicinal purposes, it is super important to look for words and phrases such as:

- suitable for medicinal use
- pure and unadulterated {aka “authentic”}
- quality is safe for internal use
- highest quality
-obtained from plants grown organically
- GC/MS analyzed {this means the oils have been tested in a laboratory to certify their high quality}

IMG_1350

People use oils for aromatherapy and for the enjoyable “smell factor” as well.  That’s great, but those are NOT the kind of oils you want if you’re going to heal your family!  You want ones that are verified to be safe {we’ll get to more of that below}.  Granted, oils are not currently FDA-approved, but we all know it takes the government a long time to jump on the bandwagon for certain healthy things, don’t we?! ;)


IMG_1351


Another important thing to look for: oils in a dark bottle.  I would never trust an essential oil that comes in a clear bottle or container!  Oils are very light-sensitive {keep them in a cool, dry place, out of sunlight} and any essential oil company worth its salt will know that! 


IMG_1349

I made this mistake once and won’t make it again!  


Speaking of oil companies….


Step 2: Choose how and where you will purchase your essential oils from: find a system that works well for you. 

There are a couple of different ways you can go with this:

a} Use a direct-sales company, like doTerra or Young Living.  Those are the most popular essential oil companies that I know of.  When you use these types of companies, you have a consultant/distributor that orders your oils for you, and the perk is that the individual is {or should be!} knowledgeable about how to use the oils and can give you tips and advice. 

b} Use a health- or natural-foods store.  Most health-food stores seem to carry essential oils nowadays, and the perk of this is that they are available anytime you want to purchase them, and the price-point is usually pretty low. 

c} Use an online company that doesn’t use a direct-sales model, like Heritage Essential oils {the amazing company I use and love}.  Here’s what I love about using a company like Heritage:

          - You don’t have to wait or depend on a consultant to place an order for you.  When I want my oils, I get online, order it myself, and it comes quickly.  I love not waiting on someone else, especially when there’s a particular medical issue I want to start working on. 

          -  The price is amazing.  I’m not paying for the product in addition to paying the salary of the sales representative.  {I have absolutely no beef with direct-sales companies whatsoever!  I used to work for one and I’m considering another in the future.  But when it comes to my medicine, I like feeling like I have access to what I need in a straightforward way.  I don’t want to have a middle-man in this case.  For Pampered Chef? Sure.  But not with my oils.  But again, PERSONAL preference!!! I know many people become a “consultant” with an oil company to earn discounts for themselves and their families…and I think that’s great! If I hadn’t fallen in love with Heritage, I probably would have done something like that to cut down on my costs.}

          -  The oils are both organic and therapeutic grade, and the company stands behind its promises!  I can see their commitment to quality all over their website, articles, and Facebook page…something I don’t have access to if I’m purchasing oils off a shelf in a natural-foods store. 

          - The support is amazing.  Heritage has a closed Facebook group {open to anyone who buys Heritage oils!} that is basically a big open forum where you can ask anything and everything about essential oils {EOs from here on out to save my fingers a little typing!}.  The founder, Linda, is amazingly helpful and owns the company with her family.  She will frequently comment on the posts herself, offering advice and prayers. {Side note: This is a company owned by a Christian family! Which you know makes my heart so happy!}

          - The option to buy oils in multiple sizes.  This is one of the things I LOVE the most about this company!! Every oil they offer comes in sample sizes {in addition to larger options – see my top photo in this post!}.  You’re not stuck with a $40 bottle of something that may or may not work for you.  The sample sizes are generally between $4-6 each, and last for quite a while themselves.  This is a great option for testing out oils to find your favorites before feeling confident to order a larger size!

I could really go on and on about Heritage.  They’re where I purchase all my EOs and they get my vote for sure {nope, I’m not an affiliate in any way…just a very happy, satisfied customer!}.

Okay, so once you’ve done a little research into what method of buying EOs works best for you, it’s time to move to the next step…


Step 3: Determine what medical problems or issues you’d like to treat with EOs. 

There is literally {LITERALLY!!} an EO for everything under the sun.  Whether you want preventative oils {like the EO equivalent of taking a vitamin} or something to treat a specific illness, there is something out there that can help you!

Do you…

- have trouble sleeping? 
- suffer from digestion and tummy troubles?
- have severe PMS?
- struggle with depression?
- suffer from severe headaches or migraines?
- want a natural cold remedy?
- want to help your child focus in school?
- want something that will help you stay sickness-free and boost your immune system?

Take some time to make out a list of what issues you are hoping to treat.  Prioritize them if money is an issue, and start with your most pressing medical issues. 

Okay, that was a long enough post for today!  In Part 2 we’ll explore how to actually use the oils once you’ve decided what to purchase! And in Part 3 I’ll discuss my favorite oils – the ones my family can’t live without anymore! 

PLEASE feel free to ask any questions you have and I’ll do my best to answer!  I’ll respond to questions right here in the comments. :)


Disclaimer:
*These statements have not been evaluated by the FDA. These products are not intended to diagnose, treat, cure, or prevent any disease.*

Monday, March 10, 2014

Pretzelz & Pigtailz {A Giveaway!}

Edit: This giveaway is now over....and the winner is: JESSICA LYNN IRWIN! I apologize to anyone who might have checked here today thinking they'd see who won...I posted it to my blog's Facebook page and totally forgot to post it here too for those without Facebook!  Oops - sorry guys!! If anyone would still like to purchase one of these precious necklaces, mention This Blessed Life when ordering for FREE SHIPPING from Pretzelz & Pigtailz now through Monday, March 17th.  Thanks so much to all who entered! 


---------------------------------------
OHHH I am just giddy with excitement over this giveaway!  Today I am happy to introduce my friend Callie and her brand-new business, Pretzelz and Pigtailz.  Callie is a successful business owner already, and she has just ventured out into this new {and I’m sure to be wildly popular!} venture of children’s jewelry.  She makes THE MOST adorable necklaces {called “bubblegum necklaces”} for girls and I pretty much want one of *everything* for Miss Olivia! 

Check out some of her adorable creations! 

How about this sweet one, “Purple Plush,” for a little girl who loves glitter and flowers: 

Or this one, “Over the Rainbow,”  for a girl who loves COLOR in her life:


Or this precious one, perfect for springtime, called “Butterfly in the Sky:”


Or this sweet little one, perfect for warm weather accessorizing:

And if you have a little girl obsessed with a certain character or movie {can you say “FROZEN?”} she has sweet little charms from several different shows and movies that she creates, as well {Frozen necklaces will be available for purchase soon – follow Pretzelz & Pigtailz on Facebook to know when they’ll be available!}. 
Photo: Oops forgot a few others here are all the charms there are 15 styles total to choose from :)

Anyone have a little girl currently obsessed with Doc McStuffins?!


Or in love with Minnie Mouse?


This is just a *sampling* of her adorable work – she has lots more to choose from on her Facebook page!
Callie is also happy to do custom creations if you are looking for specific colors.  However, she is currently expecting and close to delivery {yay!} so custom orders are on hold and will resume once her little one enters the world and she has time to adjust to her new life as a mom of three! :)  {She will continue to ship orders in the next few months, just not custom orders.}
All Pretzelz & Pigtailz necklaces are on adjustable chains.  The 18 inch necklaces can be adjusted down to 14 inches, and the 22 inch ones can be adjusted down to 18 inches.   This really makes them so versatile, and suitable for toddlers and older girls, as well. 
One important thing to note: Pretzelz & Pigtailz has an ever-rotating inventory…so if you see a necklace you like, snatch it up because Callie likes to keep things fresh and exciting! :)

I’ve never made it a secret on here that I’m a girl on a budget, and all of her necklaces are only $15, which is SUCH a great price-point!  {Frozen necklaces, when available, will be $18 – still an amazing price for such a popular item!} These are absolutely the perfect gift for a daughter, grand-daughter, niece, god-daughter, you name it!  I guarantee that you will bring a *huge* smile to a precious little girl’s face when you gift one of these! :)

Okay, so how do YOU win one?!  Follow the easy steps below on Rafflecopter…the more you do, the better your chances, starting with visiting Pretzelz & Pigtailz on Facebook
Winner will receive one necklace of their choice: a $15 value, including free shipping!!  {Frozen necklaces are not included at this time.}
 
Giveaway ends Friday, March 14th, at midnight.  Winner will be announced on Saturday morning, March 15th!
Good luck! :)
a Rafflecopter giveaway

Wednesday, March 5, 2014

Cinnamon Carrot Muffins

WOW it’s been such a long time since I posted a recipe!  “Chatting” with a friend today on Facebook reminded me of how far I’ve come with this clean-eating/whole foods journey.  Back in 2010, when I started, I was a total newbie out to change two products a month in my pantry to the cleaner version.  I gave myself a 5-year goal.  LOL! It’s insane how fast and furious the whole food revolution has come.  Back in 2010, what I was doing was new, different, and out-of-the-ordinary.  Now most people understand {even if not always perfectly implemented} how to eat “clean” – which is AWESOME!

There is a huge spectrum of clean/healthy/whole foods eating, and I am definitely not at the most extreme end.  There are many people eating both a lot better and a lot worse than I do.  I mostly aim to eat whole foods and organic when I can afford it.  This is what works for our family! Wherever YOU are on the journey, just keep educating yourself and aiming to make better and better choices as the months and years go on.  Any gains you make in this area are positive!  {For my recipes, click here.  For my Clean Eating posts and journey {including almost all of my recipes}, click here.}


Anyway, on to this yummy recipe!

The great thing about carrots is that they are relatively cheap {even organic carrots!} and they keep for a long time when compared to many other vegetables.  With spring arriving soon, I thought I’d share these muffins.  How fun would they be for a little Easter brunch or Springtime party? Really, they’re great year-round.  They have been a big hit in our family! They’re a great snack for toddlers, too, since the carrots mostly dissolve – leaving a soft muffin that has some great vegetable nutrition in it! I love that they are simple and *just* sweet enough.  I like mine sliced open with a little butter but they are really nice as-is, too.  :)


IMG_1156


Cinnamon Carrot Muffins
{Adapted from Whole Living Magazine, April 2011}


Dry ingredients:
1 1/4 C white whole wheat flour  {I like King Arthur brand!}
2 T ground flax seed
1 tsp ground cinnamon
1 tsp baking powder
1/2 tsp baking soda
1/8 tsp salt


Wet ingredients:
1/3 C vegetable oil {I like Spectrum brand organic canola at Target}
1/3 C buttermilk **don’t worry – you can make your own below!
2 large eggs
3/4 C unpacked light brown sugar or turbinado sugar {I’ve done both}
1 C finely grated carrots {maybe 3 or 4 depending on size}
1/4 C water


Preheat oven to 350.  Grease a 12-muffin tin with cooking spray.

Whisk dry ingredients in a bowl. 

Whisk wet ingredients in a separate bowl.

Fold dry ingredients into wet and mix until just combined.

Spoon batter into muffin cups. 

Bake until a toothpick inserted in the center of a muffin comes out clean, about 20-22 minutes depending on your oven.  Cool in pan slightly then transfer to wire rack. 

Enjoy!! 


**You can always easily make your own buttermilk by using milk and white vinegar.  Put 1 T of vinegar into a measuring cup, then fill with milk up to the 1 C line.  Stir and then wait a minute or two for it to sour the milk.  So for this recipe, use 1 tsp of white vinegar, fill with milk to the 1/3 C line, stir and wait a moment before using in the recipe. 

Sunday, March 2, 2014

No-Spend Month {Round 2}: Week 4

It’s MARCH and I can spend MONEY again!! Ohhhh happiness!!  :)


No-Spend Month {February 2014} 012


Honest to goodness, I really and truly don’t spend that much “fun” money on a monthly basis.  We keep a really tight budget normally…but there’s something about knowing you can’t spend *any* money for a while that suddenly makes you want to spend it…know what I mean? 

This whole month was a great exercise in discipline and so, so good for me spiritually.  So many of the things I wanted to spend money on – while really good, quality things, and mostly for my house and my family…are things I didn’t really need (obviously, because we only paid for the true necessities this month and we survived just fine). 

It also was a good exercise in *delayed* gratification…you know, the exact opposite of what our culture preaches.  Knowing that you can having something someday, but just not right now, is extremely hard as an American {sad, but unfortunately very true}. 

Delaying or going without also forces creativity and frugality…and makes you appreciate what you do have SO much more!  That whole phrase, “necessity is the mother of invention?”  Totally true of no-spending month, too.  :)

This will definitely be something we continue in the future, especially as our children get older.  I can see it opening up SO many valuable conversations about wants vs. needs, waiting and saving for things we really want, having financial goals, and talking about the physical abundance we have here in America. 

So yes…down to the nitty gritty.  My husband has asked that I not share specific financial details about what we were able to accomplish this month, and so of course out of my immense respect for him I’m not going to share that here.  But…good, positive financial things were accomplished.  :)

Basically? We are smiling, not crying, at the end of these long short four weeks of February. And that, my friends, is a very good thing!


Of course, I am only human and now that it’s March and my {very small} monthly “fun money” budget is restored, OF COURSE I went out and went shopping!  I showed lots of restraint but it was so nice to be able to browse Target clearance racks again without whizzing by them and trying to convince myself they didn’t really exist! ;)

I picked up two pumpkin tea towels for 88 cents each {you guys, the fall obsession is VERY REAL here! lol}, this adorable little pot for $1 {total Ikea hack! Can’t wait to put a cute little potted plant in it and watch it die because I kill anything green} and this GORGEOUS calendar I have hanging from my bulletin board {I needed a new one and this one was only $2.98! yay!}. 


IMG_1261

IMG_1262


My mom and I also took a little trip to some antique/consignment stores yesterday.  I found this little weathered bird for $4 {love!!}, a vintage wooden rolling pin for $3 {I’ve been looking for a while so this was super exciting!} and some clear glass Pyrex for 50 cents and $1.   All the colored Pyrex was either really damaged and scratched or very overpriced…so unfortunately no fun, colorful pieces came home with me…but that’s okay.  :)


IMG_1266


IMG_1268


And if you follow me on Instagram {I’m blessedlifeblog and I’m private but only because I like having the option to look at your info and make sure you’re not an axe murderer first! haha!} you know that yesterday Luke and I were able to go on a “date.” He’s been asking for a week, ever since Chris and I went out, and we went to Panera for a cookie, then Toys R US to spend some Christmas money on a Toy Story alien he’s been wanting, then Goodwill and found a Toy Story Memory game for 99 cents.  We had such a fun time giggling and being silly and pulling all the strings of the toys and buttons in the Toy Story aisle.  It’s amazing what a wonderful day can be had and cherished for only $3! :)


IMG_1250


Unfortunately, this is a *terrible* time of year to sell kids’ clothes {at least here in CT}.  Nobody is buying winter OR summer right now and so I didn’t have as much luck as I was hoping for.  My balance at the consignment shop is a measly $5 after four whole weeks!  LOL!  I will still work on selling old kids’ clothes as we get closer to spring. 


Recap:

Grocery budget: Stayed on budget!  I had ONE dollar left.  lol

Consignment Fund: $63 {wanted to hit $100 but I will be able to sell summer stuff more successfully when the weather gets a little warmer}.


Bottom line: we WILL do this again next year…and you should too!  Only positives…no regrets.  :)

Thanks for following along on my journey!